
A water mark on the plasterboard around a rooflight is easy to blame on the glass. In many cases, however, the glass is not the problem. Learning how to seal rooflights starts with identifying whether water is entering at the glazing, the frame, the roof covering or the upstand beneath it. Applying sealant to the wrong area can trap water, damage a roof membrane and make a straightforward repair harder to diagnose.
For UK homeowners, the best approach is methodical. A properly installed flat rooflight or roof lantern should admit generous daylight while remaining weather-tight, thermally efficient and low-maintenance for years. If a leak has appeared, deal with the cause rather than simply covering it with silicone.
How to seal rooflights: find the source first
Choose a dry day and inspect the rooflight from inside and outside. Inside, look for staining, damp insulation, mould, dripping water or condensation on the inner pane. Outside, check the perimeter where the rooflight meets the upstand and where the upstand meets the roof covering.
There are three common sources of apparent rooflight leaks. The first is a failed perimeter seal between the frame and the upstand. The second is a fault in the roof covering, flashing or membrane around the upstand. The third is failed glazing gaskets or a damaged sealed glass unit. Each needs a different repair.
Condensation can also be misleading. If moisture forms mainly on the room-side glass during cold weather, particularly in kitchens or bathrooms, it may be condensation rather than rainwater ingress. Improve ventilation, use extractor fans and check that the rooflight has an insulated upstand and thermally efficient glazing before reaching for sealant. Moisture between the panes, on the other hand, normally points to a failed double- or triple-glazed unit.
It is useful to note when the issue occurs. A leak that appears only after wind-driven rain may indicate a vulnerable flashing detail. Water that shows after prolonged rainfall can travel beneath the roof finish from some distance away. Do not assume the point where water appears indoors is directly below the fault.
Understand which seal should be repaired
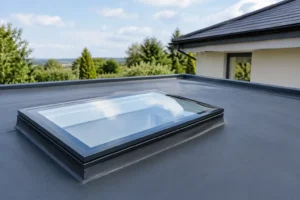
A fixed flat rooflight is normally installed on a weathered kerb or upstand. The roof membrane is dressed up and securely terminated around that upstand, while the rooflight frame sits above it on a purpose-made seal. This layered arrangement directs water away from the opening.
The visible bead of sealant is not always the primary waterproofing measure. On a professionally fitted system, the roof membrane, flashing detail, mechanical fixings, compression seals and drainage paths all work together. Smearing a thick bead across every joint can block designed drainage channels and hide deterioration beneath.
Roof lanterns follow a similar principle but have more joints between their glazing bars, caps and frame sections. These should be checked for loose pressure plates, damaged gaskets and missing end caps. The manufacturer’s fitting instructions matter because each aluminium system has specific sealing positions, fixing centres and compatible materials.
If the rooflight is still covered by an installation or product warranty, contact the installer before carrying out repairs. Unauthorised alterations may affect your cover, especially where the issue involves the roof membrane, glazing unit or structural opening.
Preparing the rooflight for resealing
Only reseal a small, accessible perimeter joint if you are confident the rooflight itself is sound and the roof covering is not split, lifted or poorly detailed. Avoid walking directly on a rooflight. Roof glazing may be strong, but it is not a safe working platform. Use appropriate access equipment or appoint a competent roofer where access is awkward, the roof is high, or the opening is large.
Start by removing loose, cracked or detached old sealant with a plastic scraper. Take care not to cut the roof membrane, scratch powder-coated aluminium or disturb glazing gaskets. A metal blade is rarely the right tool around a finished frame.
Clean the joint thoroughly using the cleaner recommended for the roof finish and sealant system. The area must be dry, dust-free and free from grease. Silicone will not bond reliably to damp surfaces, and incompatible cleaners can leave a residue that causes a new bead to fail early.
Check the material before choosing a sealant. A flat roof may be finished in EPDM, GRP fibreglass, felt, liquid-applied waterproofing or single-ply membrane. These materials do not all accept the same products. A sealant suitable for aluminium and glass may not be suitable for EPDM or PVC roofing. Where the membrane has failed, use a compatible patch or roofing system repair rather than relying on a general-purpose sealant.
Applying sealant correctly
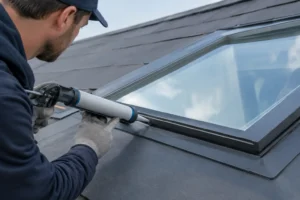
For a narrow perimeter gap between the rooflight frame and the upstand, use a high-quality neutral-cure, low-modulus silicone or hybrid polymer sealant that is confirmed as compatible with both surfaces. Neutral-cure products are generally safer around aluminium than acetoxy silicones, which can have a strong vinegar smell and may react with certain materials.
Cut the nozzle to suit the joint width, then apply one consistent bead rather than several overlapping lines. The aim is a continuous weather seal, not a bulky ridge. Tool the bead gently with a suitable profiling tool to press it into both sides of the joint and create a neat finish that sheds water.
Do not seal over weep holes, drainage slots or factory-made channels in the frame. These details allow incidental water to escape. If they are blocked, water may back up into the structure and create the very leak you are trying to prevent.
Allow the sealant to cure for the stated period before exposing it to heavy rain or washing the area. Cure times vary with temperature, humidity and bead depth, so a mild dry day gives the best conditions. Keep the sealant cartridge label and make a note of the product used for future maintenance.
When the roof covering needs repair instead
If the roof membrane is cracked, blistered, lifting at the upstand or visibly split at a corner, the repair is a roofing job rather than a rooflight-sealing job. The membrane should extend up the upstand to the required height and be properly bonded or mechanically terminated according to its system specification. A poorly formed corner detail is a frequent cause of leaks around flat roof openings.
Traditional lead flashing may be present on pitched roof windows or older installations. It should be correctly lapped and dressed to channel water away, not sealed along every edge. Flashing relies on overlaps and gravity as much as sealant. A roofer can assess whether leadwork needs re-dressing, replacing or integrating with the surrounding roof finish.
This is also the point to consider the condition of the upstand. Timber upstands can deteriorate if they have been repeatedly wet, while inadequate insulation around the opening can increase condensation risk. Repairing the waterproof layer without addressing rotten timber or missing insulation simply delays the next problem.
Signs that replacement is the better investment
Resealing is sensible where a local joint has aged but the rooflight, upstand and roof covering remain sound. It is not a cure for failed glazing, warped frames or an outdated unit with poor thermal performance.
Replacement is worth considering if you can see condensation between panes, cracked glass, persistent leaks after a roofing repair, brittle gaskets, or significant heat loss around the opening. A modern aluminium rooflight with a thermal break and energy-efficient glazing can improve comfort as well as weather resistance. Slim-frame designs also bring in more daylight without compromising security or the clean architectural finish of an extension.
For larger refurbishment projects, it can be more cost-effective to coordinate rooflight replacement with a new flat roof covering. This allows the installer to form the upstand, membrane junction and rooflight fixing detail as one properly designed system rather than adapting new components to old, uncertain details.
Keep rooflights watertight with simple checks
Inspect rooflights twice a year and after severe weather. Clear leaves, moss and debris from the surrounding roof so water cannot pond against the frame. Check that drainage routes remain open, look for sealant cracks or separation, and investigate interior staining promptly.
Avoid aggressive pressure washing around the perimeter. High-pressure water can force moisture into joints that would cope perfectly well with normal rainfall. If you clean the glazing, use non-abrasive products and avoid solvents that may damage seals, gaskets or coated aluminium.
A bright extension should feel like the best part of the house, not a source of worry when the rain starts. If the cause of a leak is unclear, a professional inspection is the safest next step – the right repair will protect both your rooflight and the rooms beneath it.