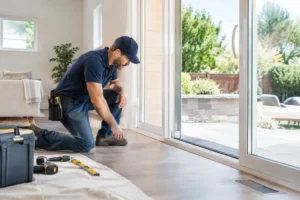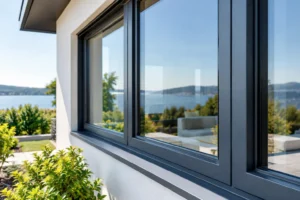

A bifold door can transform a kitchen extension or living area, but only if the frame is made to suit the opening it will sit in. Knowing how to measure bifold openings correctly gives you a reliable starting point for a quotation and helps prevent costly issues when the doors are ready to fit. The key is to measure the structural opening carefully, account for the finished floor level and identify anything that is not square, level or plumb before ordering.
For a made-to-measure aluminium system such as Smarts Visofold 1000 Bifold Doors, exact manufacturing sizes should always be confirmed following a professional survey. However, homeowners and supply-only customers can take accurate initial measurements with a tape measure, spirit level and a little preparation.
Start with the structural opening
The structural opening is the clear space in the wall where the bifold frame will be installed. It is measured from the finished internal face of one side of the opening to the finished internal face of the other, and from the finished floor level to the underside of the lintel or structural beam.
Do not measure an existing door frame and assume the replacement will be the same size. If old doors are still in place, measure the opening between the inside faces of the existing frame only for an initial indication. The old frame, packers, trims and sealant will need to be removed before the true structural dimensions can be verified.
In a new extension, avoid measuring from unfinished blockwork if plaster, render, tiling, flooring or other finishes are still to be added. These finishes reduce the final opening size. In many projects, the most useful measurement is the planned finished opening after all floor and wall finishes are complete.
How to measure bifold openings for width
Measure the width of the opening in three places: across the top, through the centre and at finished floor level. Record every measurement in millimetres, rather than rounding to centimetres. Aluminium bifold doors are precisely manufactured, so a difference of even a few millimetres can matter.
Use the smallest of the three widths as the working figure for an initial quote. If the opening is narrower at the bottom, for example, a frame sized to the wider top measurement may not fit without alteration. The same principle applies when an opening has slightly bowed or uneven walls.
There must be an appropriate fitting tolerance around the frame for positioning, packing, insulation and perimeter sealing. The exact allowance depends on the door system, opening condition and installation method. Do not simply deduct a standard amount and treat that as a final order size. A clean, square new-build opening may need a different allowance from an older property with uneven brickwork or plaster.
It is also sensible to measure the external width. This can reveal a stepped reveal, exposed brick detail or external finish that could affect flashing, trims or the way the frame is sealed.
Check the sides are plumb
Place a long spirit level against both sides of the opening. If either jamb leans inwards, the available width can reduce as the frame rises. A tape measure alone will not show this clearly.
Minor irregularities can often be accommodated during fitting, but substantial movement in the wall or a visibly out-of-plumb opening should be addressed before installation. Forcing a bifold frame into a distorted opening can affect panel alignment, locking and weather performance.
Measure height from the finished floor level
Take the height from the finished floor level to the underside of the lintel in three places: left, centre and right. Again, use the smallest measurement as the basis for early planning.
The phrase “finished floor level” is particularly important. If you are fitting engineered timber, tiles, laminate or carpet after the doors are installed, the eventual floor build-up needs to be allowed for now. A door that appears to have enough height over a concrete slab can become too tight once 15mm of tile, adhesive and levelling compound is added.
For an extension leading to a patio, establish the final relationship between the internal and external surfaces. Bifold doors can be specified with different threshold arrangements, including lower options that improve access to the garden. The best choice depends on drainage, weather exposure, floor construction and whether a level transition is required.
A low threshold is attractive for indoor-outdoor living, but it does not remove the need to manage water. The external patio should fall away from the property, and drainage may be required in exposed locations. Threshold design should be agreed before the opening height is finalised, not after the doors have been manufactured.
Look for a level head and floor
Use a spirit level or laser level to check the underside of the lintel and the floor. If the floor slopes, record the high point and low point. If the head slopes down at one side, the lowest point governs the maximum practical frame height.
Bifold doors rely on accurate frame geometry. Their rollers, hinges and locking points are designed to work within a carefully aligned outer frame. A level, well-prepared base is not a finishing detail – it is fundamental to smooth operation.
Measure diagonals to check the opening is square
Measure diagonally from the top left corner of the opening to the bottom right, then from the top right to the bottom left. In a square opening, these dimensions will be the same. A small variation may be manageable, particularly in an existing property, but a significant difference should be investigated.
An opening that is out of square can make a door frame harder to set accurately. It may also leave uneven gaps around the perimeter that are difficult to finish neatly with trims. A surveyor can assess whether the issue can be accommodated with packers and finishing details, or whether remedial work is needed before installation.
Take a few photographs as you measure. Include the internal view, external view, lintel, floor junction and any areas of damaged masonry. These are useful when discussing a quote, especially for supply-only projects where the installer is not assessing the opening in person at the first stage.
Account for the door configuration, not just the aperture
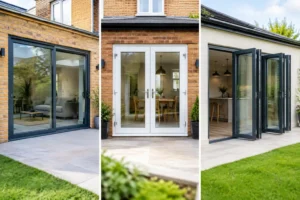
The opening size tells you what can fit, but it does not decide the best bifold layout. Before requesting a quote, consider how many panels you want, where the doors will fold and which panel will be used most often.
A three-panel door may suit a modest opening and provide a practical everyday traffic door. Wider apertures may work better with four, five or six panels, depending on the panel widths permitted by the chosen system. More panels can create a broader opening when folded back, but they also create more sightlines and a larger stack of panels at the side.
Think about furniture, kitchen islands, garden paths and the direction people naturally walk through the room. A traffic door opening towards a dining table, or a panel stack blocking a narrow patio, can undermine an otherwise excellent design. Decide whether the doors should fold internally or externally too. This affects available space, weather exposure and how the threshold area is used.
The frame colour, glazing specification and handle finish can be chosen later, but the configuration should be considered while the opening is being planned. It is far easier to adjust a proposed layout before construction is complete than after plastering, flooring and landscaping are underway.
Consider replacement openings and extensions differently
For replacement bifold doors, the existing opening may conceal problems such as deteriorated lintels, uneven cavity closers or damaged brickwork. Once the old frame is removed, the opening can be slightly larger, smaller or less regular than expected. This is why final sizes should not be released for manufacture from measurements taken around an existing frame alone.
For new-build and extension projects, communicate the required finished structural opening to your builder early. This gives the team time to form a suitable aperture, fit a correctly sized lintel and allow for insulation, plaster and flooring. If steelwork is involved, confirm its final position and any boxing detail, as this can reduce usable height.
Where Building Regulations apply, the complete door installation may also need to meet requirements for thermal performance, safety glazing and, in some cases, access. A quality aluminium bifold system with a thermal break and energy-efficient glazing can support a comfortable, well-insulated home, but its performance depends on correct specification and fitting.
When a professional survey is the right next step
Initial measurements are ideal for comparing layouts and receiving a fast budget quotation. A professional survey is the stage that protects the final order. The survey confirms manufacturing dimensions, checks the condition of the aperture, assesses threshold and drainage details, and identifies practical concerns that may not be visible on a simple plan.
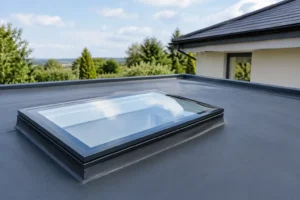
This is especially worthwhile if the opening is very wide, includes a corner arrangement, has a steel beam, sits beneath a roof lantern, or is part of a renovation where finished levels are still changing. It is also advisable where you want a near-flush internal-to-external transition, as small level differences have a major effect on the finished result.
Measure carefully, keep the smallest width and height figures, and be open about any uneven walls or unfinished building work when requesting your quote. That information helps Smarts Bifold Doors recommend a made-to-measure solution that looks right, operates reliably and makes the most of the light and garden access your project is designed to create.