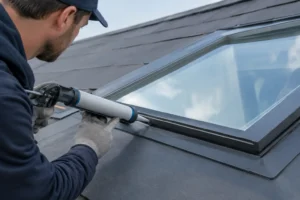

A flat roof light can transform the part of an extension that standard windows struggle to reach: the middle of the room. When considering how to plan flat roof lights, start with the way you want the finished space to feel and function, rather than choosing a size from a brochure. The right roof light brings daylight deep into a kitchen, dining area or family room without compromising comfort, privacy or the performance of the roof.
For most homeowners, the best result comes from planning the roof light alongside the extension layout, structural design and glazing specification. This avoids a common disappointment: a large opening that looks impressive on drawings but creates glare, overheating or awkward furniture placement once the room is finished.
Start with the room, not the roof opening
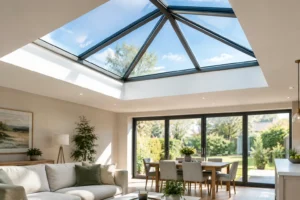
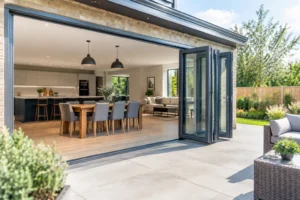
Think about where daylight is needed most during the day. In a rear extension, the darkest area is often the point furthest from the new patio or bifold doors. Positioning a flat roof light over this zone can make the entire room feel more balanced, particularly where kitchen units, a dining table or a central island would otherwise sit beneath a darker ceiling.
The intended use of the space matters. A roof light above a dining table creates a strong focal point and makes the room feel more open. Over a kitchen island, it can provide excellent working light, but consider reflections on polished worktops and whether pendant lighting will also be needed. In a living area, a more central placement often gives softer, more even daylight.
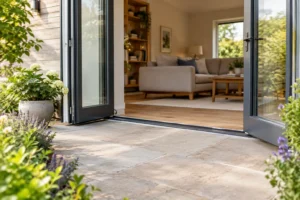
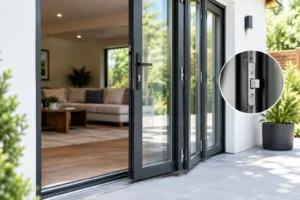
It is also worth looking upwards from inside the room. Flat roof lights are designed to sit close to the roofline, so they retain a clean, contemporary ceiling profile and preserve views of the sky. That low-profile appearance works especially well with slim aluminium patio doors or bifold doors, where the aim is to create a bright, connected indoor-outdoor space.
Choose the right size and number of flat roof lights
Bigger is not automatically better. A generous roof light can make a compact extension feel far larger, but the ideal glazed area depends on the room size, roof structure, orientation and amount of vertical glazing. A room with wide sliding or bifold doors may only need one carefully positioned roof light, while a deeper side-return extension may benefit from two smaller units spaced along its length.
As an early design guide, many homeowners consider glazing equal to around 15 to 25 per cent of the floor area. This is not a rule or a substitute for professional advice, but it is a useful starting point when discussing options with your designer or installer. The aim is enough daylight to change the room, without turning the roof into an unnecessarily large source of solar gain.
Multiple roof lights can be more flexible than one large opening. They can distribute light more evenly, work around steels or joists, and create a rhythm that suits a long extension. One larger unit, on the other hand, can give a cleaner architectural statement and fewer visible internal divisions. The best choice depends on the existing property and the roof design.
Allow for the structural opening and upstand
Every flat roof light needs a correctly formed structural opening and an insulated upstand. The upstand raises the roof light above the finished roof surface, helping weatherproofing and drainage while creating a secure base for installation. Its exact height and construction should be agreed with the roofer, builder and roof light supplier before work starts.
Do not assume the visible glass size is the same as the roof opening. Frame dimensions, kerbs and installation tolerances all affect the required aperture. Ordering before the structural details are confirmed can lead to delays or expensive alterations on site.
A competent structural designer should also confirm how the roof will carry loads around the opening. This is particularly relevant for wider roof lights, older properties and extensions with steelwork. Good planning keeps the structure discreet and helps prevent an internal ceiling layout that feels compromised by unnecessary bulkheads.
Plan for orientation, sun and privacy
Roof orientation has a major effect on comfort. South-facing roof lights receive the strongest sun and can make an extension wonderfully bright, but they require more thought around solar control. East-facing units bring morning light, while west-facing glazing can create intense afternoon and evening glare. North-facing roof lights usually deliver cooler, more consistent light with lower solar gain.
The right glass specification is often more valuable than simply reducing the size of the roof light. Solar-control glass can limit excess heat while still admitting useful natural light. Low-emissivity coatings and high-performance double glazing help retain warmth in colder months, supporting the thermal efficiency of the extension.
Consider the surroundings too. A roof light may overlook neighbouring upper-floor windows, or allow views down into your room from nearby properties. Obscure glazing is available where privacy is a concern, although it changes the quality of light and reduces clear sky views. In many cases, thoughtful positioning is the better solution.
Specify glazing that performs all year round
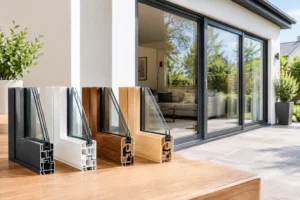
A flat roof light should be selected as a complete system, not as a pane of glass. Look at the frame, thermal break, glazing build-up, weather seals and the way the product interfaces with the roof covering. Aluminium systems with a thermal break offer the slim, durable finish many homeowners want while helping to reduce heat transfer through the frame.
For overhead glazing, safety is essential. The internal pane should be laminated so that, in the unlikely event of breakage, it remains held together rather than falling into the room. The outer pane is normally toughened to withstand external impact and thermal stresses. Your supplier should confirm that the chosen unit is suitable for its intended overhead application.
Ask for clear performance information rather than relying on broad claims. U-values indicate how readily heat passes through a product, while solar factor relates to the amount of solar energy admitted through the glazing. A lower solar factor may help on a highly exposed south-facing roof, but it can also reduce the warming effect of winter sun. There is no single best specification for every extension.
Decide whether opening ventilation is needed
Fixed flat roof lights are often the simplest option. They provide maximum daylight, a clean appearance and no moving parts, making them an excellent choice where the room already has adequate opening windows or doors.
Opening roof lights can be useful in kitchens, garden rooms and spaces where warm air gathers at ceiling level. Because hot air rises, a high-level opening can support natural ventilation when paired with lower-level openings such as patio doors or windows. Electric opening units are particularly practical when the roof light is out of reach, and rain sensors can close the unit automatically if the weather changes.
However, ventilation is not a reason to overlook overheating. Opening a roof light may improve airflow, but it does not remove the need for sensible sizing, suitable solar-control glass and shading where appropriate. If the extension contains a kitchen, your designer should also account for extract ventilation separately.
Coordinate the roof light with lighting and interior design
Plan artificial lighting before the ceiling is closed. Roof lights reduce the area available for downlights, and poorly positioned fittings can reflect in the glass after dark. A lighting plan can combine task lighting over work surfaces with softer wall lights or pendants, leaving the roof light itself free to frame the sky.
Think about blinds at this stage as well. Some homeowners prefer the uninterrupted appearance of a roof light without blinds, while others want the option of controlling glare, heat or early-morning light. Manual, electric and solar-powered blinds are available, but access, power supply and recess details should be agreed before installation.
The internal finish around the opening deserves attention. A clean plasterboard reveal can make the roof light look integrated, while a carefully designed ceiling recess can add depth. Your builder should protect the glazing during plastering and decorating to avoid scratches or contamination from construction materials.
Check permissions, Building Regulations and installation details
Many flat roof lights can be included within permitted development when they are part of a compliant extension, but this depends on the property, location and scope of work. Listed buildings, conservation areas and certain planning conditions can change the position. Check early with your local planning authority or project professional rather than relying on assumptions.
Building Regulations will generally apply to an extension and its roof glazing. The final design needs to address structural safety, thermal performance, ventilation and safe overhead glazing. Building Control, your architect or your contractor can advise on the requirements for the project, including the relevant limits on glazed areas and energy performance.
Installation quality is just as important as product quality. The roof covering must be correctly dressed to the upstand, insulation must be continuous around the opening, and drainage falls must direct water away from the roof light. A well-specified unit fitted poorly can still cause avoidable issues with water ingress, condensation or heat loss.
Get a plan that works from roof to garden
The most successful extensions treat the roof light, doors and windows as one glazing scheme. Matching frame colours and sightlines between a flat roof light and aluminium doors can give the room a more considered finish, while high-performance glazing helps keep it comfortable through every season. Smarts Bifold Doors can help homeowners specify bespoke glazing solutions for nationwide supply or installation.
Before committing, share your plans, roof construction details, room orientation and preferred finish with a specialist. A few decisions made before the roof is built can protect the daylight, comfort and clean architectural look you want from the space for many years.